Use the official AWS Lambda adapter image to handle the Lambda runtime
FROM public.ecr.aws/awsguru/aws-lambda-adapter:0.9.0 AS aws-lambda-adapter
Use the official Bun image to run the application
FROM oven/bun:debian AS bun_latest
Copy the Lambda adapter into the container
COPY --from=aws-lambda-adapter /lambda-adapter /opt/extensions/lambda-adapter
Set the port to 8080. This is required for the AWS Lambda adapter.
ENV PORT=8080
Set the work directory to /var/task. This is the default work directory for Lambda.
WORKDIR "/var/task"
Copy the package.json and bun.lock into the container
COPY package.json bun.lock ./
Install the dependencies
RUN bun install --production --frozen-lockfile
Copy the rest of the application into the container
COPY . /var/task
Run the application.
CMD ["bun", "index.ts"]
Make sure that the start command corresponds to your application’s entry point. This can also be `CMD ["bun", "run", "start"]` if you have a start script in your `package.json`.This image installs dependencies and runs your app with Bun inside a container. If your app doesn’t have dependencies, you can omit the `RUN bun install --production --frozen-lockfile` line.

Create a new `.dockerignore` file in the root of your project. This file contains the files and directories that should be _excluded_ from the container image, such as `node_modules`. This makes your builds faster and smaller:

.dockerignore
node_modules Dockerfile* .dockerignore .git .gitignore README.md LICENSE .vscode .env
Any other files or directories you want to exclude
2

Build the Docker image

Make sure you’re in the directory containing your `Dockerfile`, then build the Docker image. In this case, we’ll call the image `bun-lambda-demo` and tag it as `latest`.

terminal
cd /path/to/your/app
docker build --provenance=false --platform linux/amd64 -t bun-lambda-demo:latest .
3

Create an ECR repository

To push the image to AWS Lambda, we first need to create an [ECR repository](https://aws.amazon.com/ecr/) to push the image to.By running the following command, we:

*   Create an ECR repository named `bun-lambda-demo` in the `us-east-1` region
*   Get the repository URI, and export the repository URI as an environment variable. This is optional, but make the next steps easier.

terminal
export ECR_URI=$(aws ecr create-repository --repository-name bun-lambda-demo --region us-east-1 --query 'repository.repositoryUri' --output text) echo $ECR_URI
[id].dkr.ecr.us-east-1.amazonaws.com/bun-lambda-demo
If you’re using IAM Identity Center (SSO) or have configured AWS CLI with profiles, you’ll need to add the `--profile` flag to your AWS CLI commands.For example, if your profile is named `my-sso-app`, use `--profile my-sso-app`. Check your AWS CLI configuration with `aws configure list-profiles` to see available profiles.

terminal
export ECR_URI=$(aws ecr create-repository --repository-name bun-lambda-demo --region us-east-1 --profile my-sso-app --query 'repository.repositoryUri' --output text) echo $ECR_URI
4

Authenticate with the ECR repository

Log in to the ECR repository:

terminal
aws ecr get-login-password --region us-east-1 | docker login --username AWS --password-stdin $ECR_URI
Login Succeeded
If using a profile, use the `--profile` flag:

terminal
aws ecr get-login-password --region us-east-1 --profile my-sso-app | docker login --username AWS --password-stdin $ECR_URI
5

Tag and push the docker image to the ECR repository

Make sure you’re in the directory containing your `Dockerfile`, then tag the docker image with the ECR repository URI.

terminal
docker tag bun-lambda-demo:latest ${ECR_URI}:latest
Then, push the image to the ECR repository.

terminal
docker push ${ECR_URI}:latest
6
Create an AWS Lambda function
Go to **AWS Console** > **Lambda** > [**Create Function**](https://us-east-1.console.aws.amazon.com/lambda/home?region=us-east-1#/create/function?intent=authorFromImage) > Select **Container image**
Make sure you’ve selected the right region, this URL defaults to `us-east-1`.
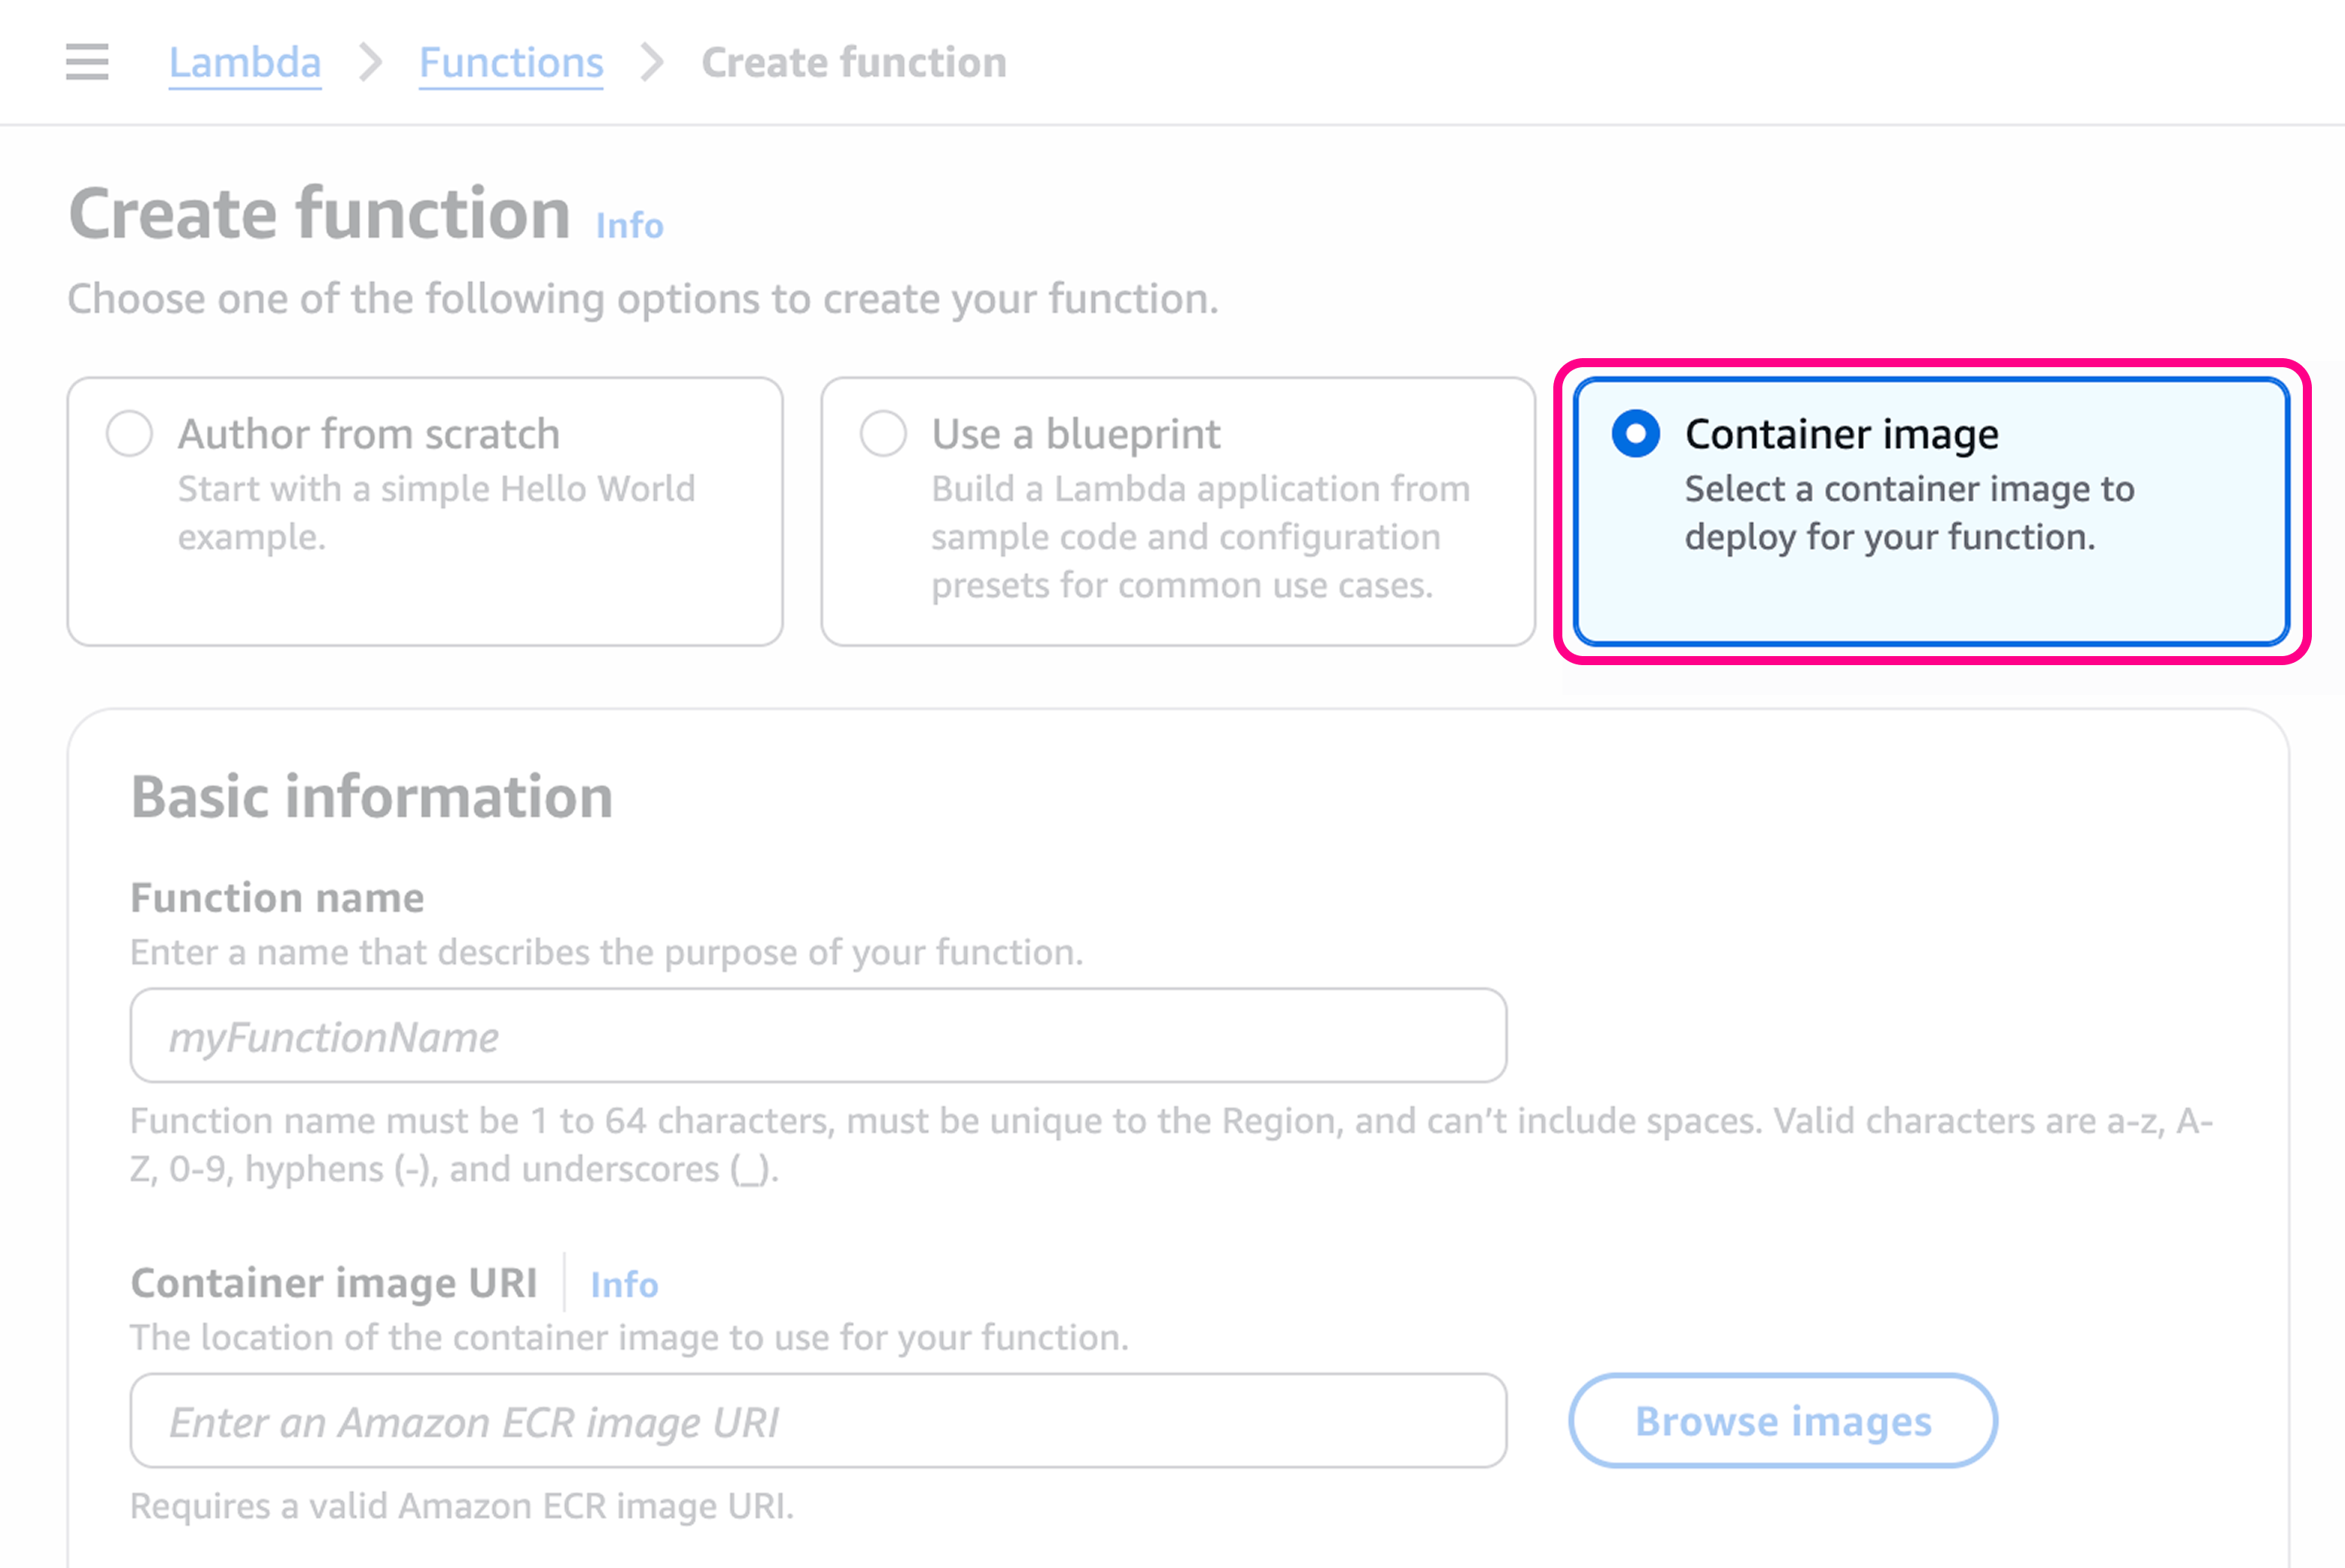
Give the function a name, like `my-bun-function`.
7
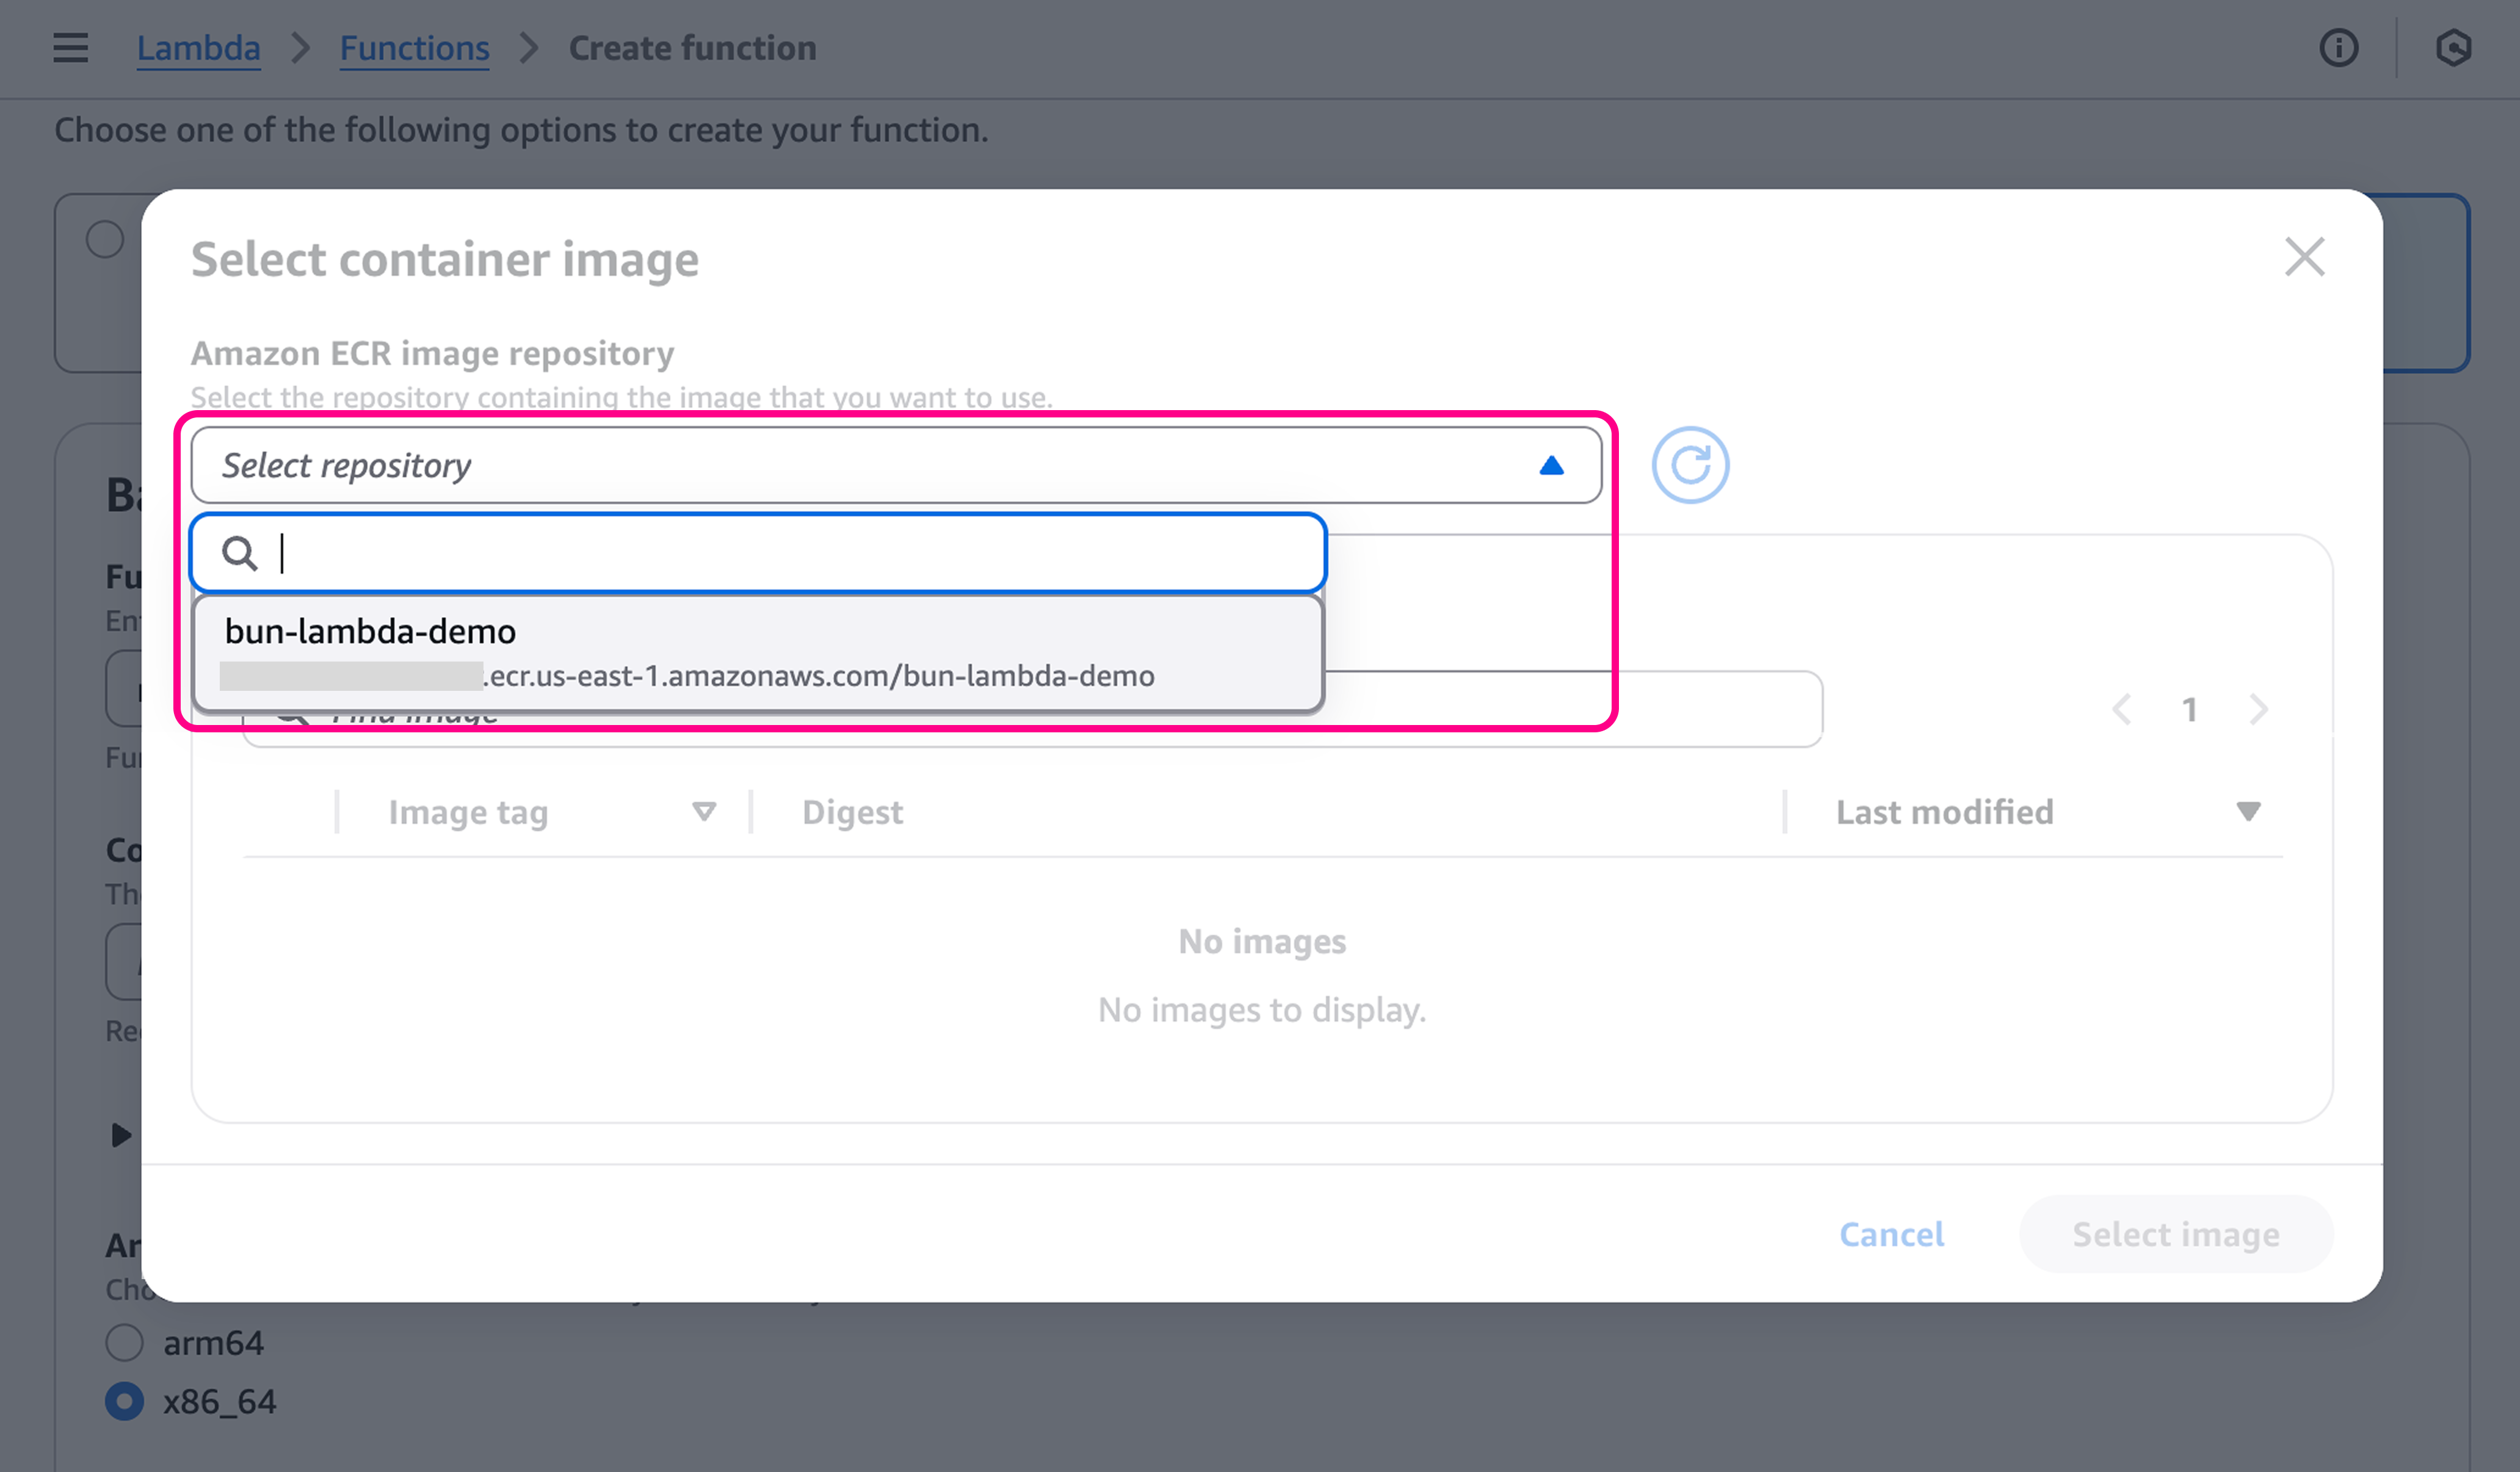
Select the container image
Then, go to the **Container image URI** section, click on **Browse images**. Select the image we just pushed to the ECR repository.
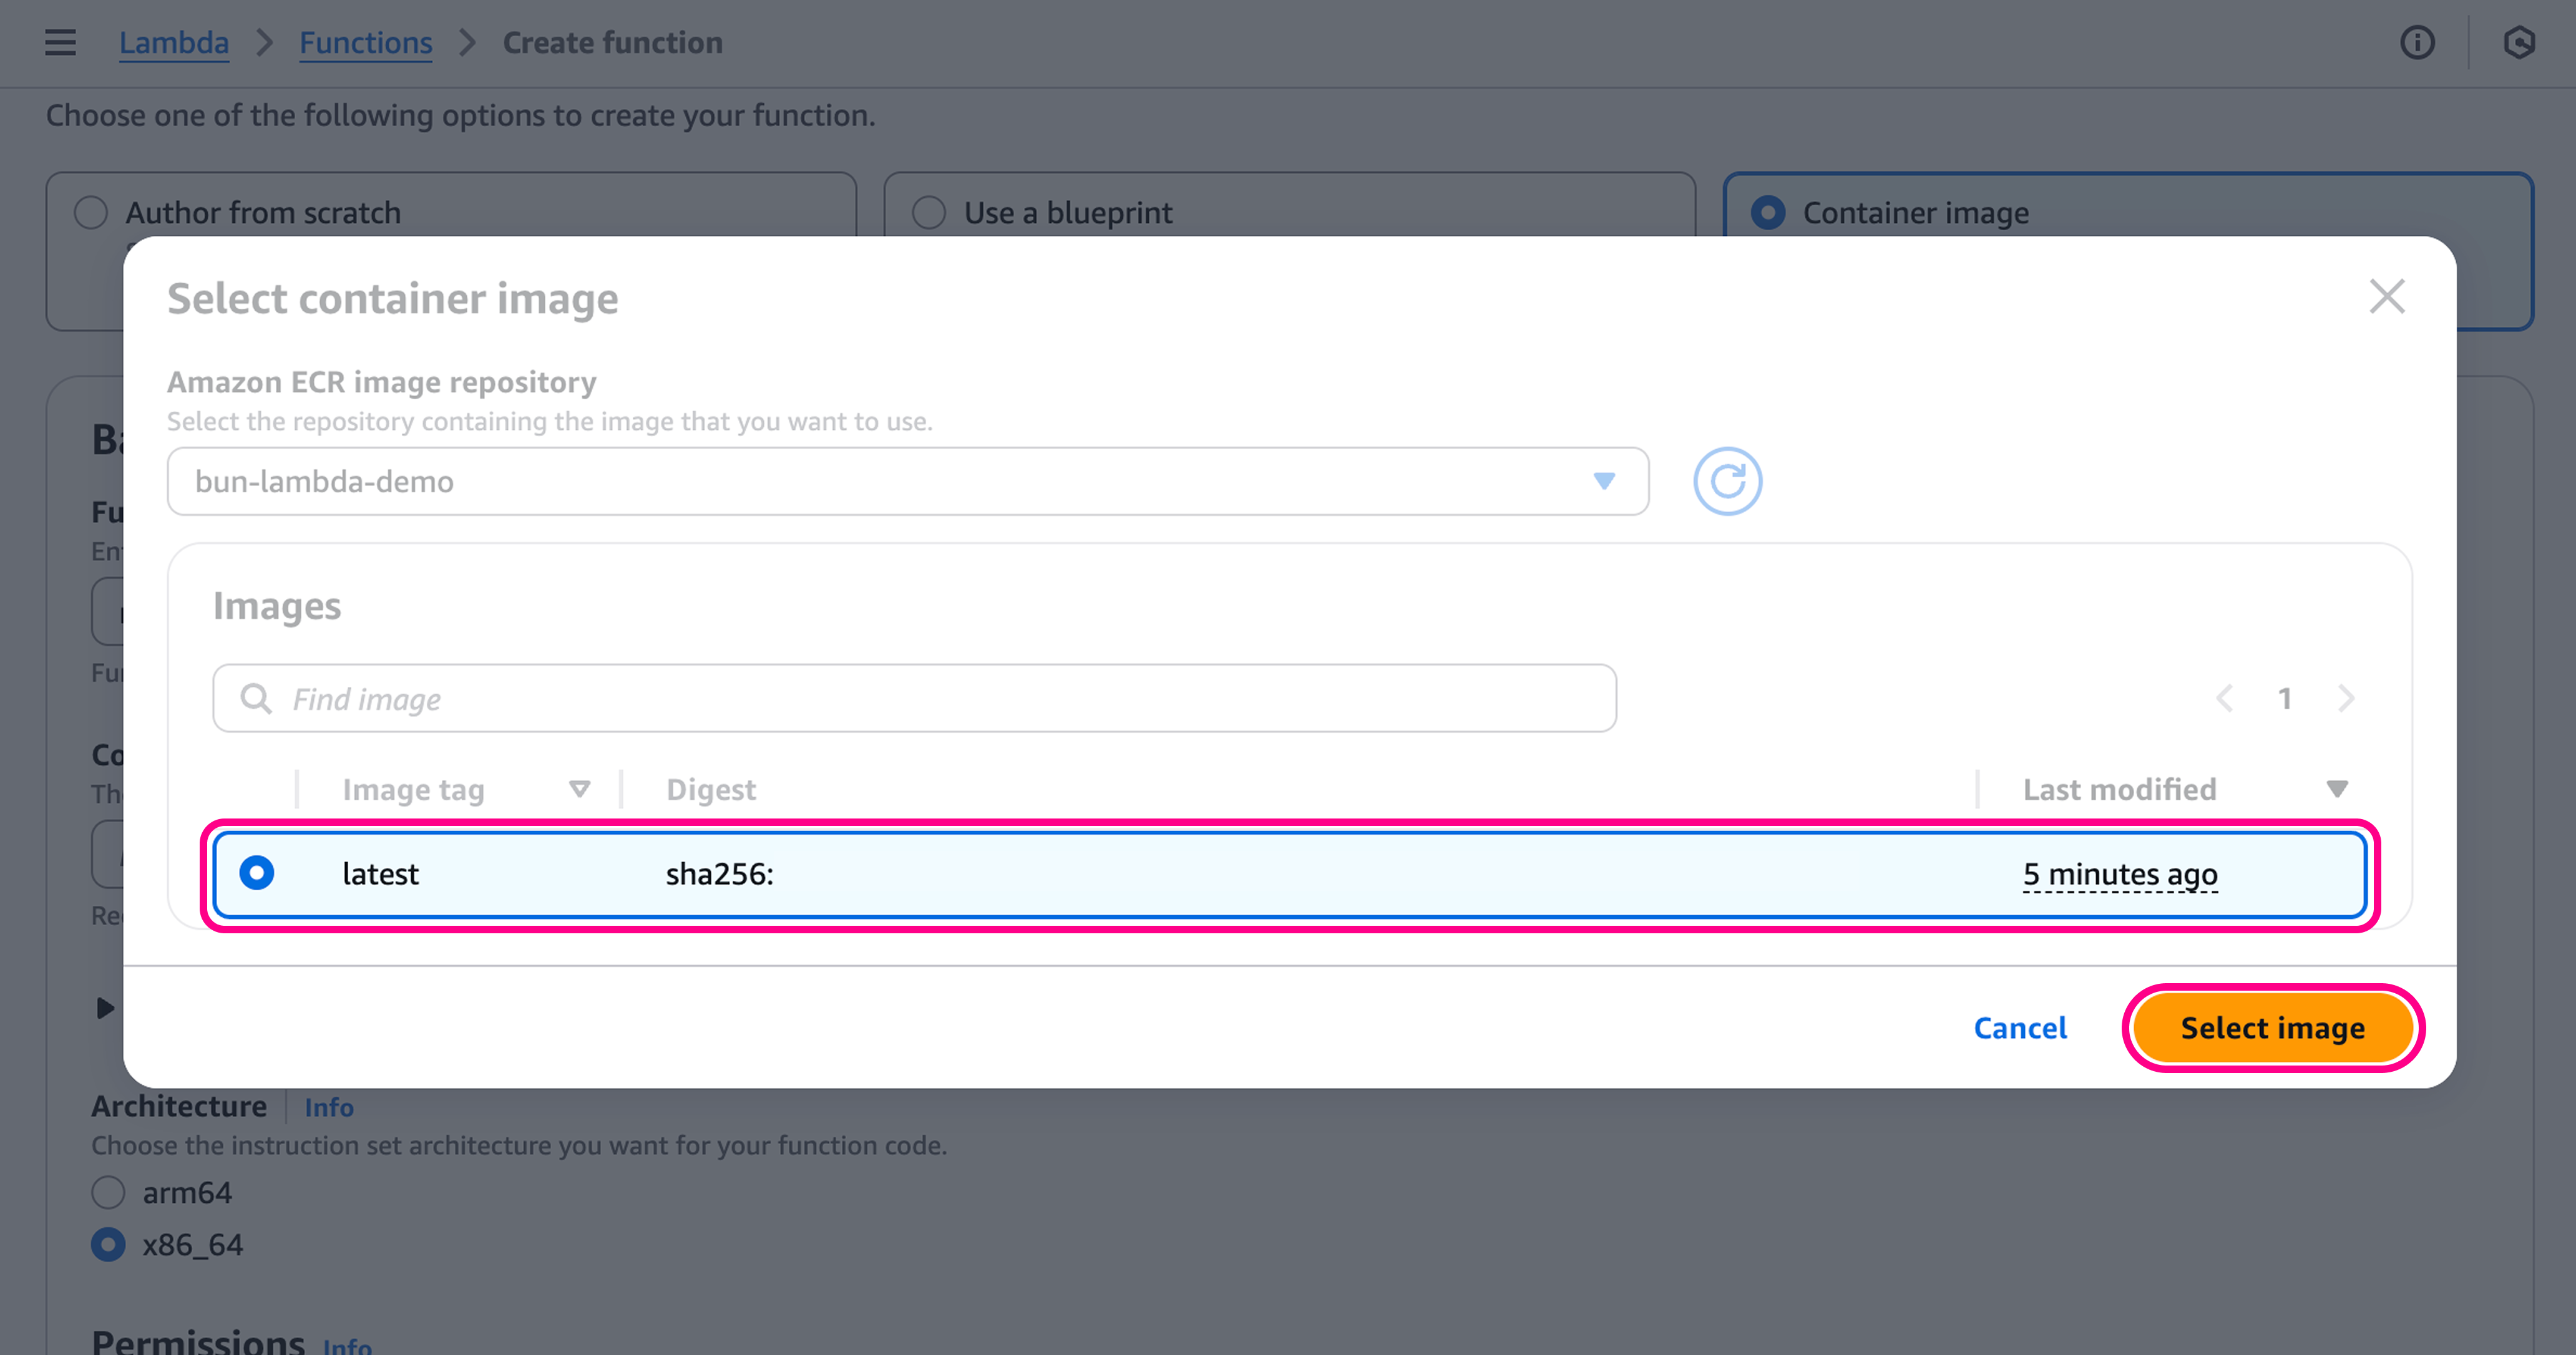
Then, select the `latest` image, and click on **Select image**.
8
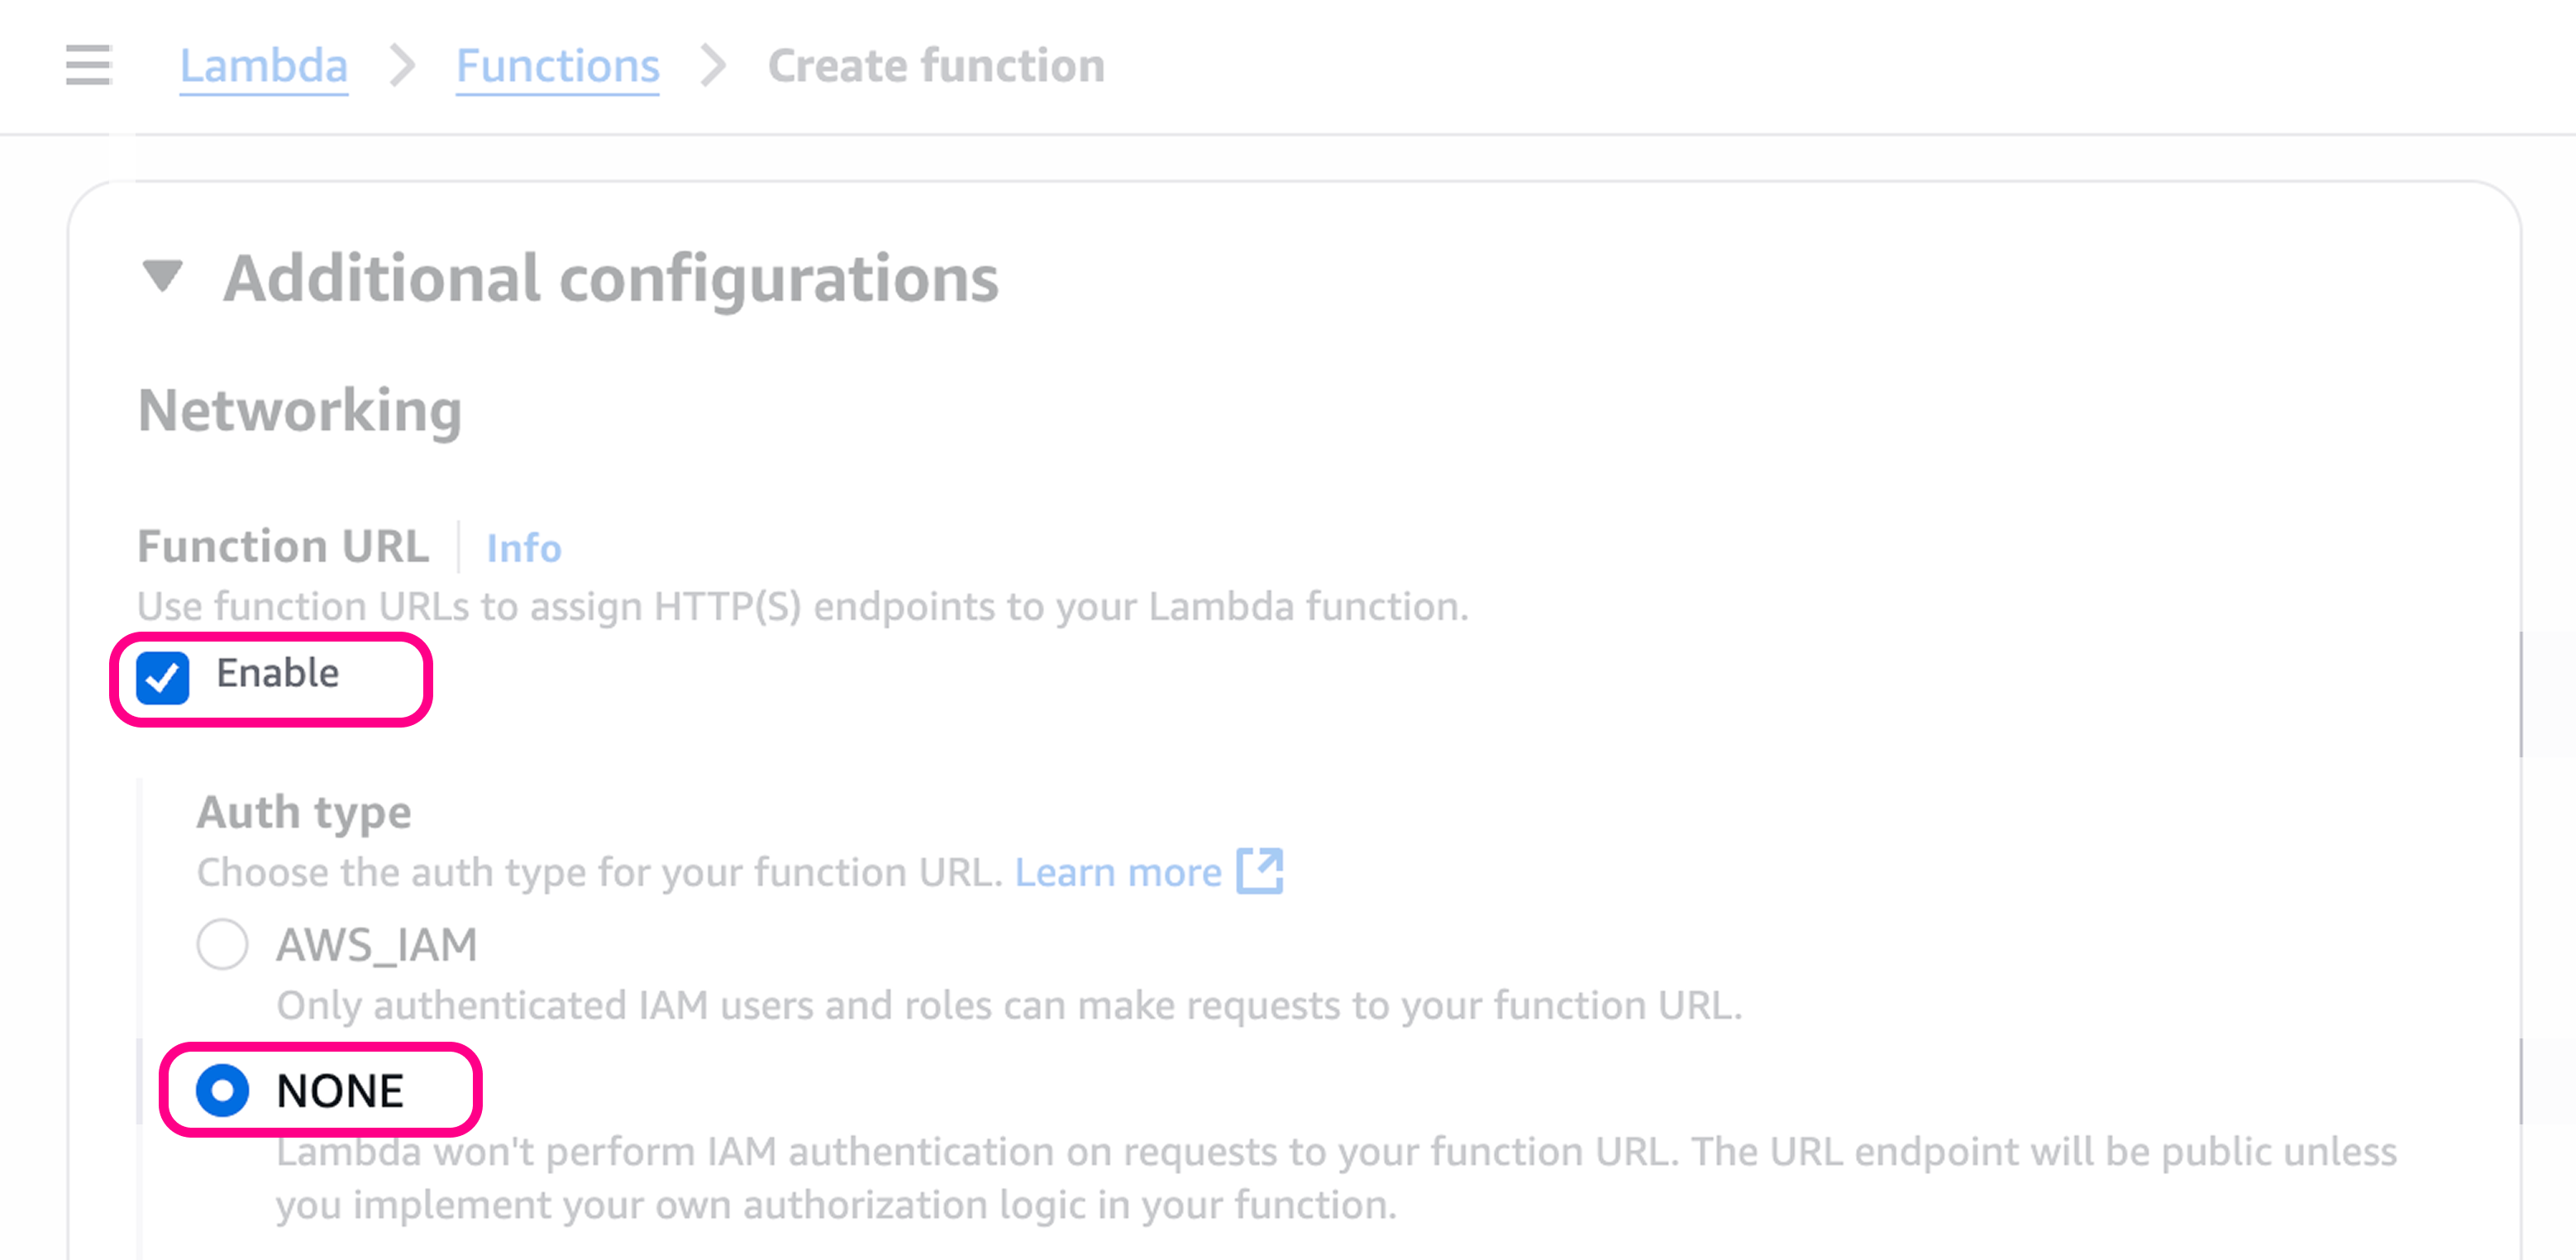
Configure the function
To get a public URL for the function, we need to go to **Additional configurations** > **Networking** > **Function URL**.Set this to **Enable**, with Auth Type **NONE**.
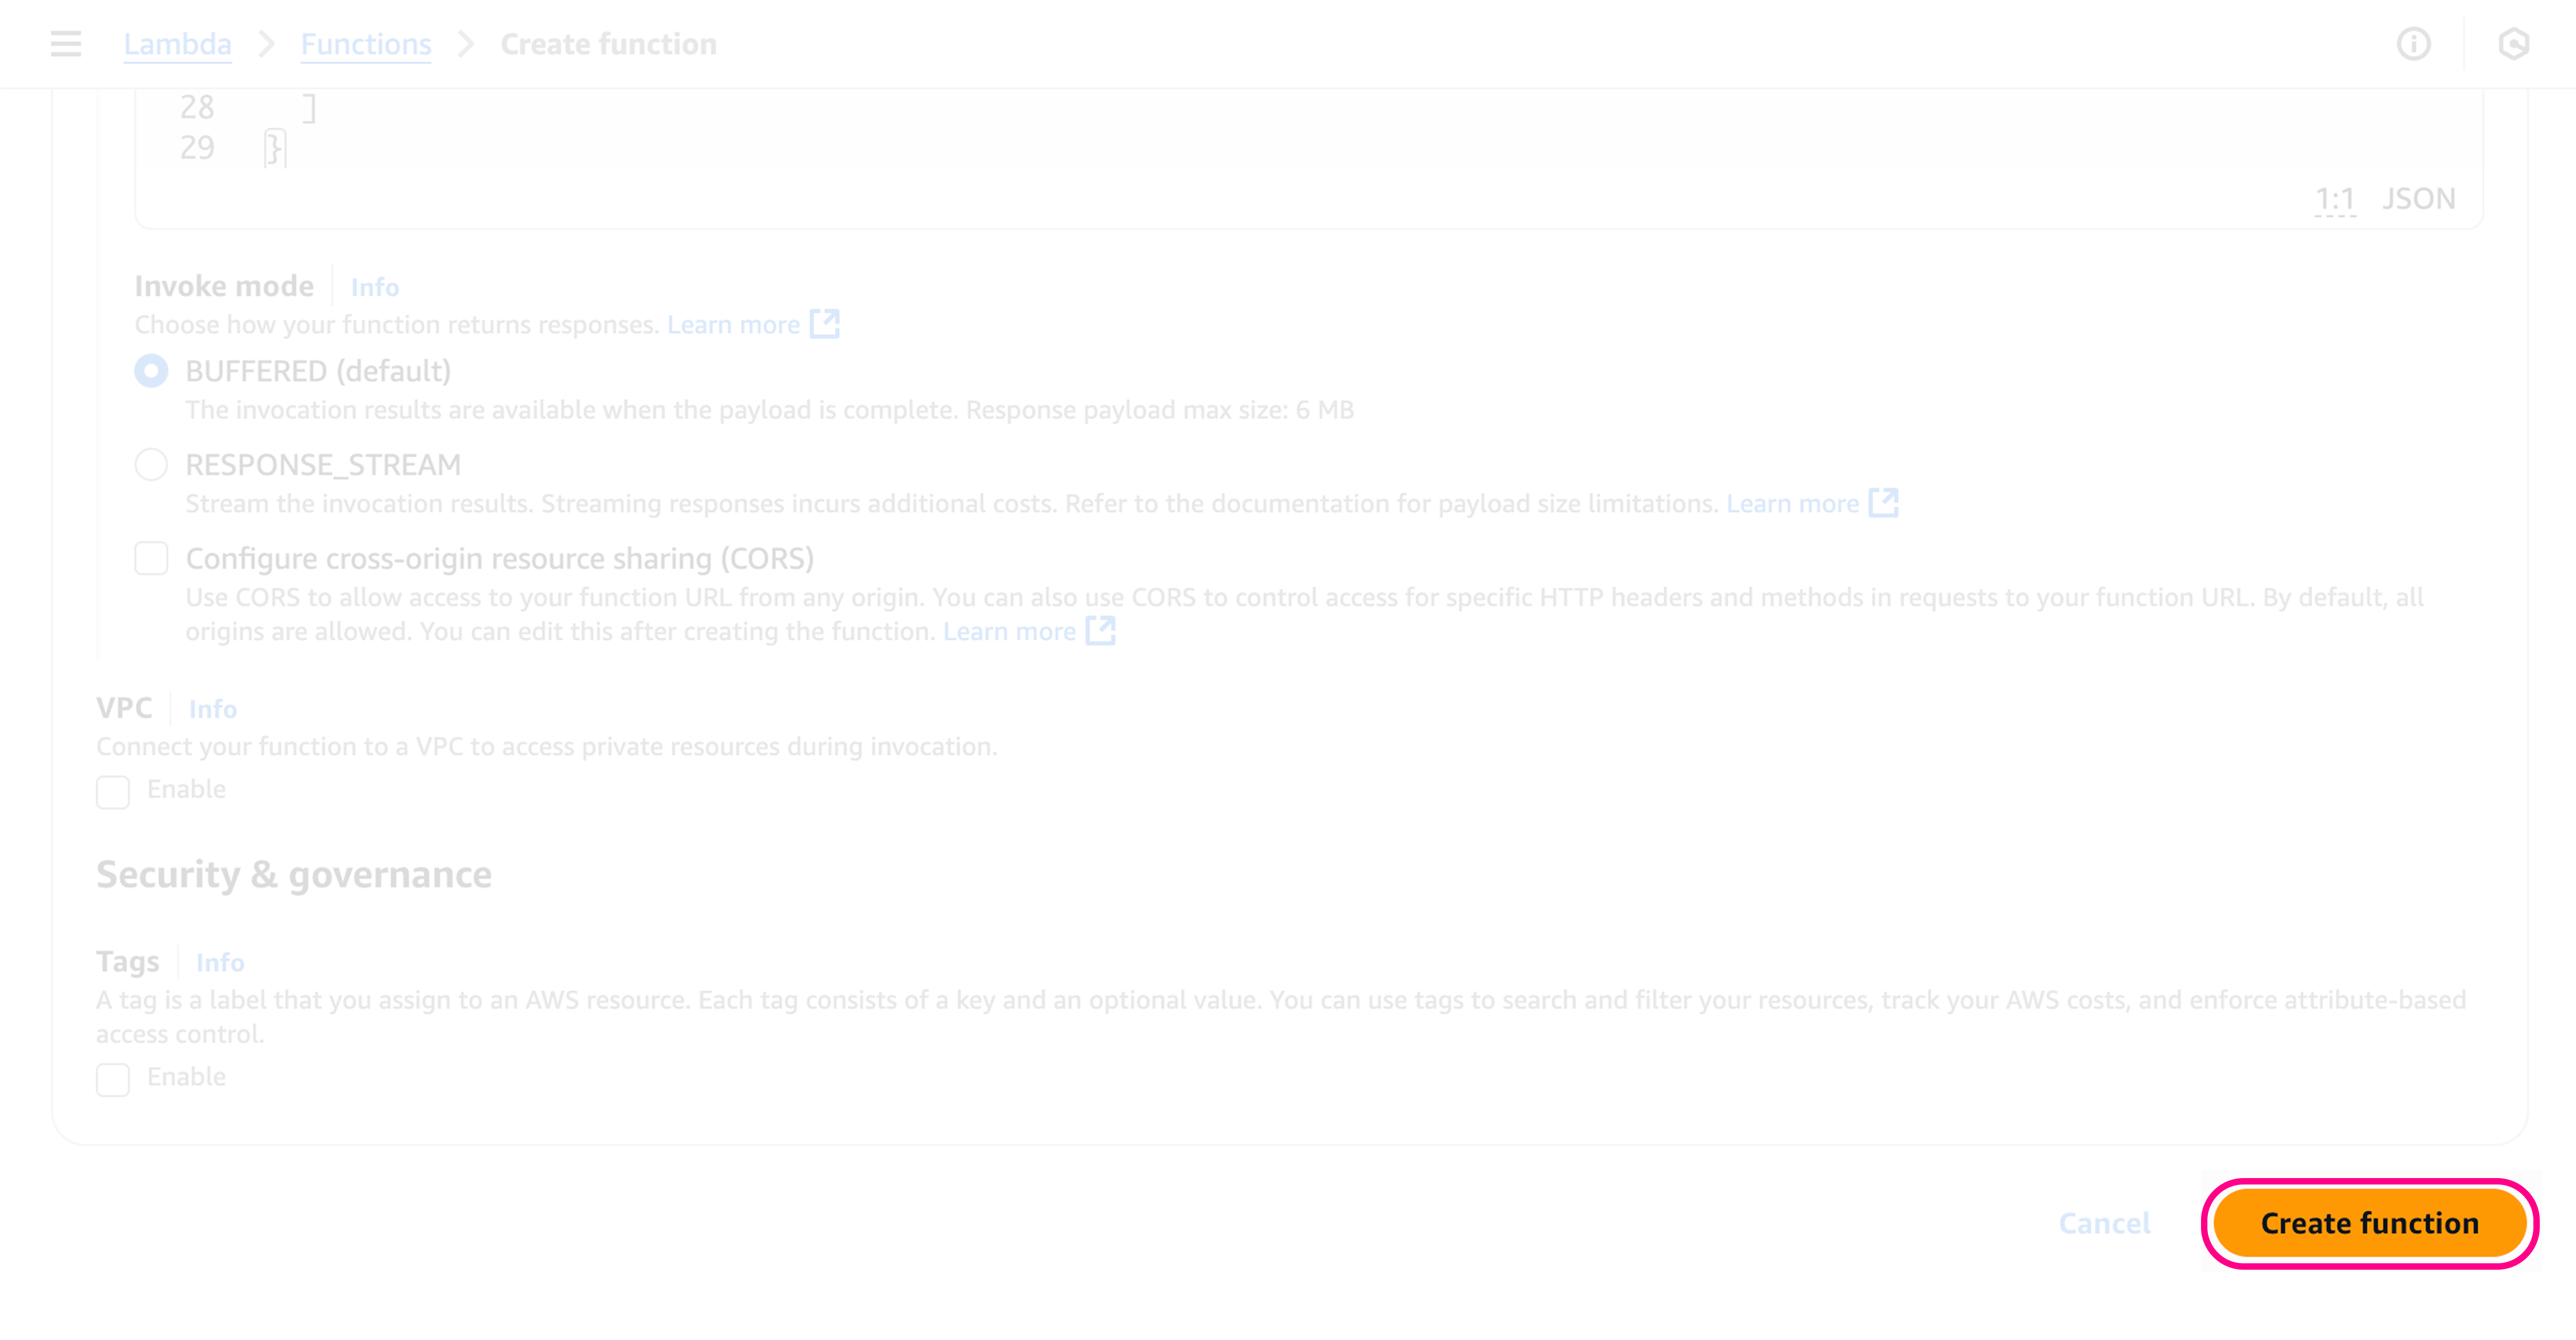
9
Create the function
Click on **Create function** at the bottom of the page, this will create the function.
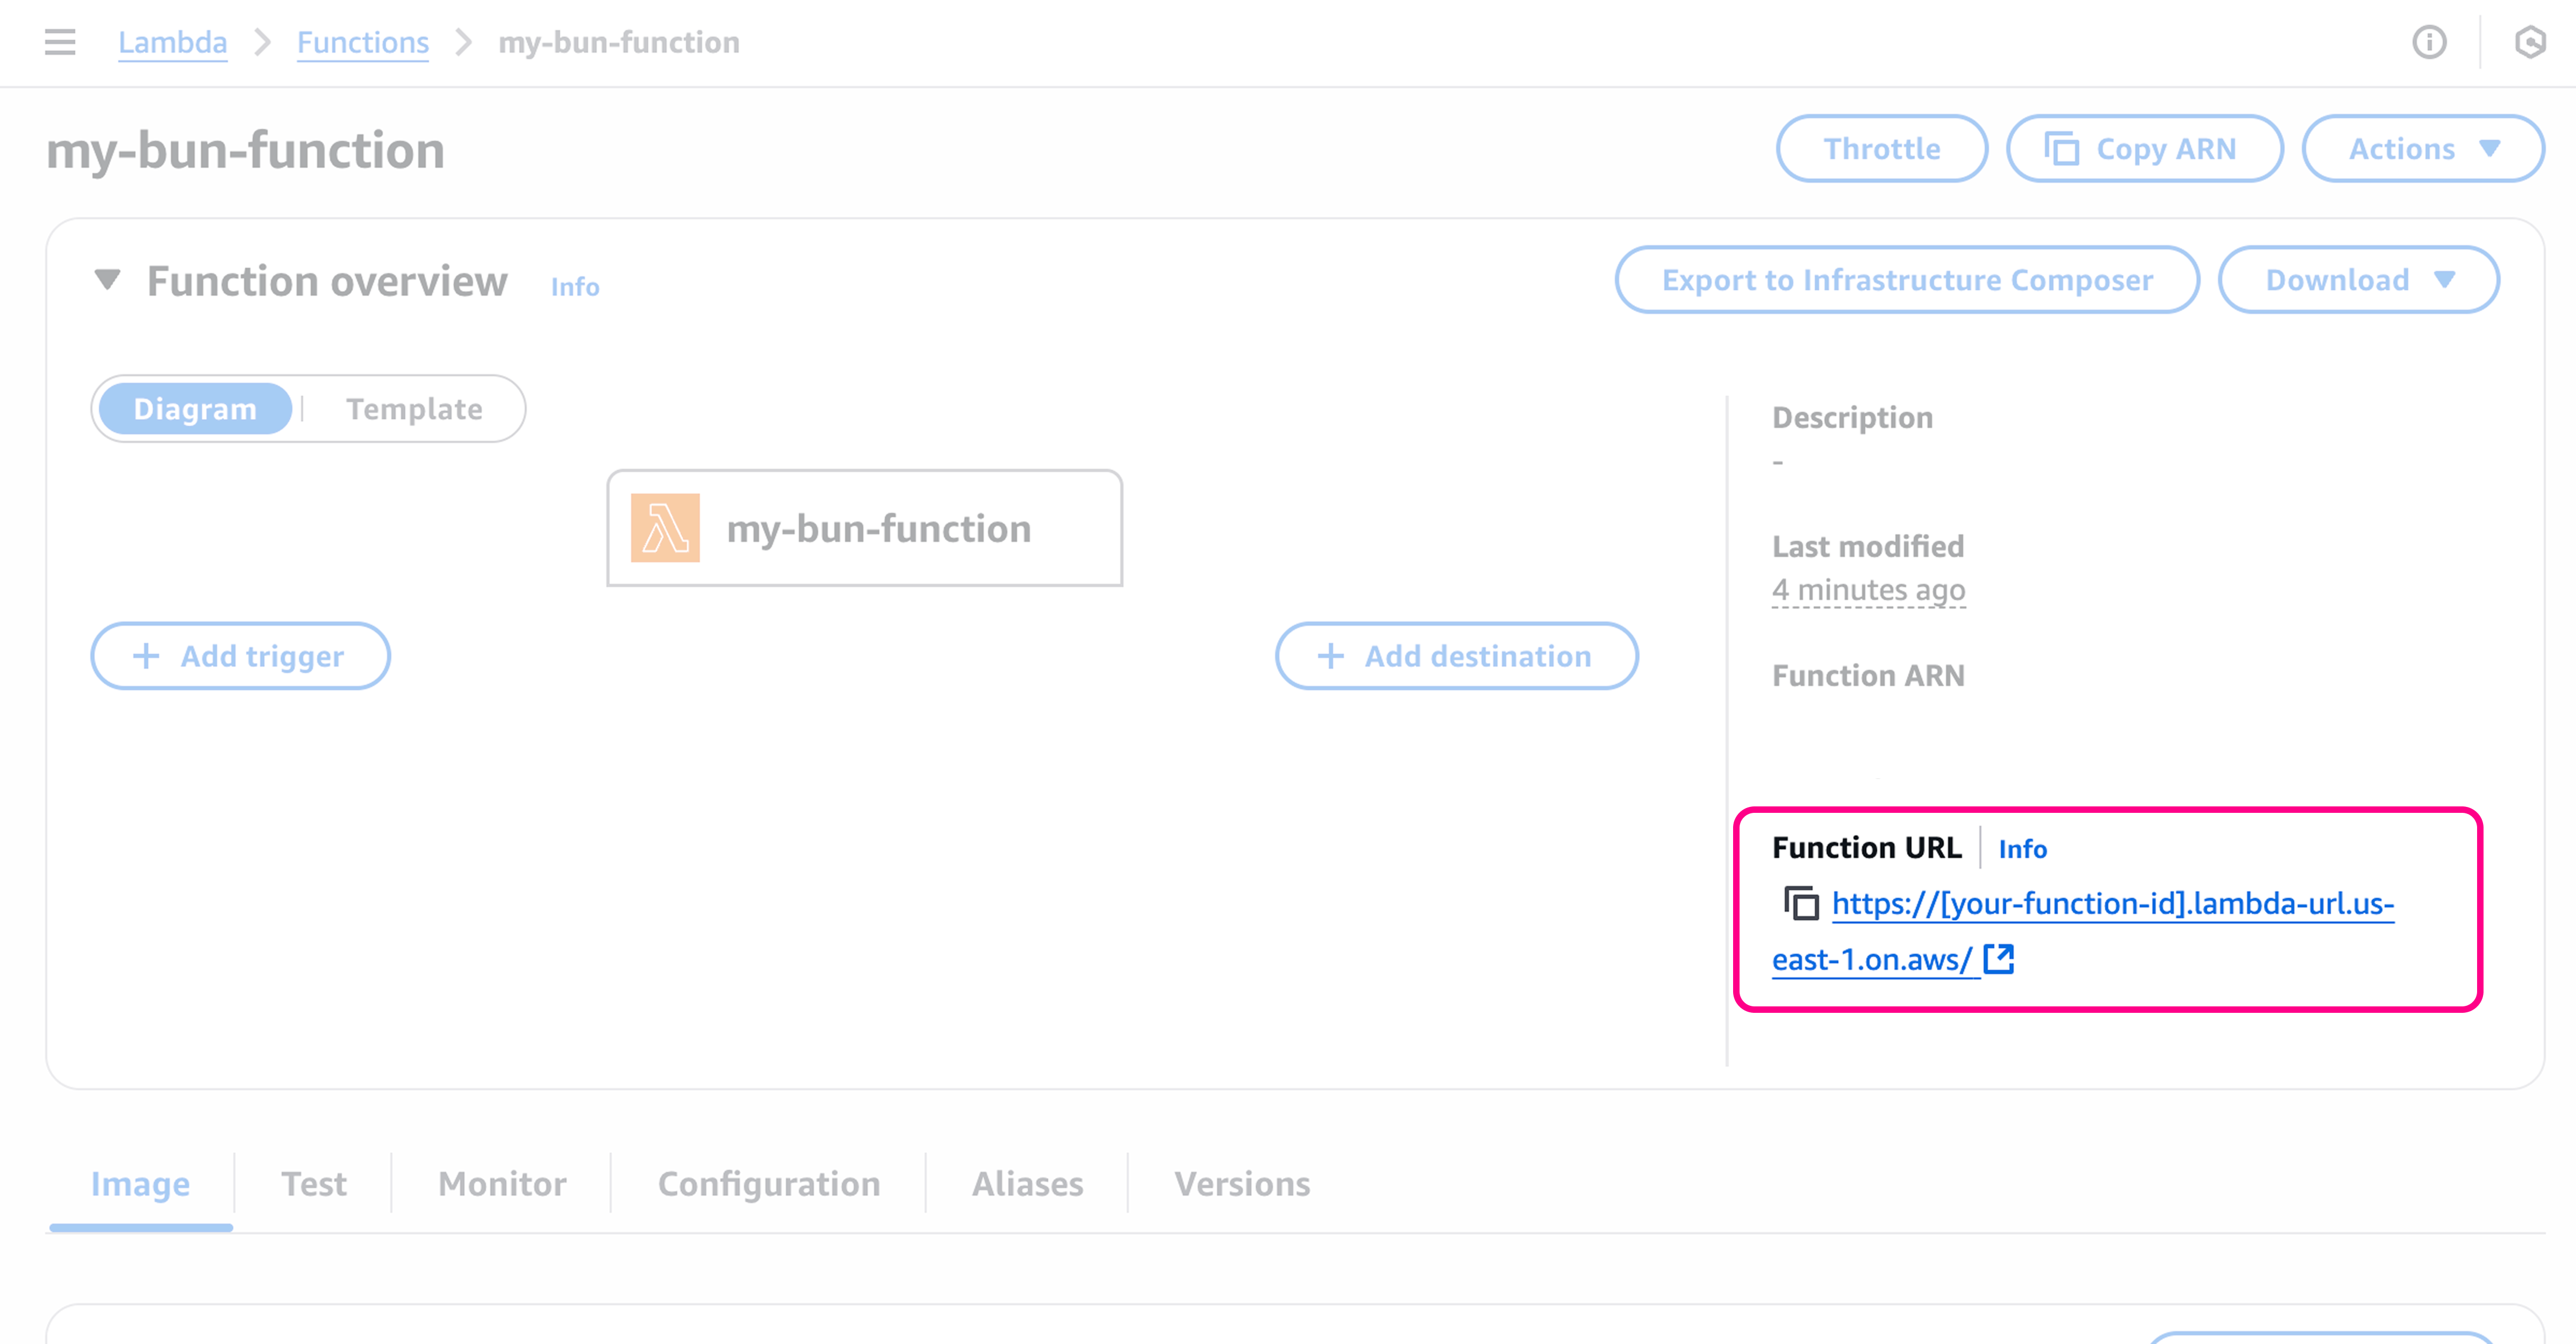
10
Get the function URL
Once the function has been created you’ll be redirected to the function’s page, where you can see the function URL in the **“Function URL”** section.
11
Test the function
🥳 Your app is now live! To test the function, you can either go to the **Test** tab, or call the function URL directly.
terminal
curl -X GET https://[your-function-id].lambda-url.us-east-1.on.aws/
Hello from Bun on Lambda!